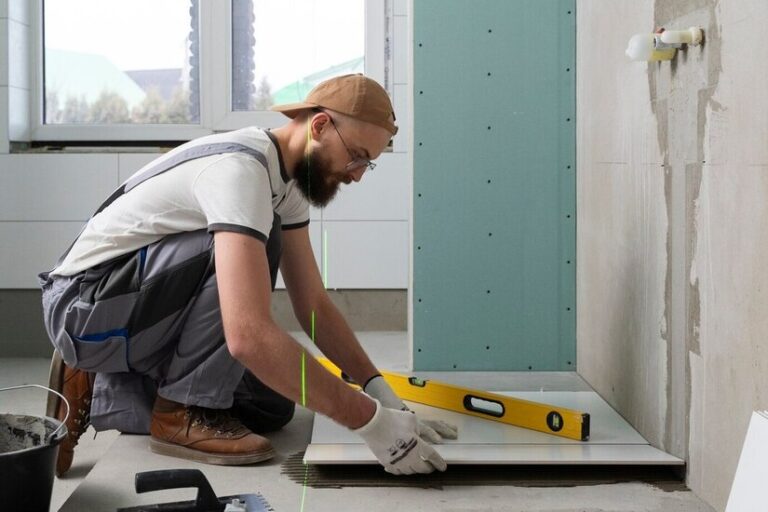
Tilework shows all the shortcuts. A wonky line, a mismatched joint or grout that flakes away too soon, these aren’t just cosmetic, they’re a sign the job wasn’t done properly.
Grout is often underestimated. People think of it as a filler, a gap plugger, something that comes in at the end of the process.
But in reality, grout does more heavy lifting than most give it credit for. It locks tiles into place, resists water, keeps out dirt, and ties the whole design together visually.
And yet it’s here that many tiling jobs fall apart. The wrong mix ratio makes the grout weak. Sloppy finishing makes the joints a grim haven. Skip the hygiene, and mould shows up quicker than you think.
This guide gets into the pro side of grouting: getting your mix ratios right, understanding the look and function of different joint profiles, and keeping it all hygienic for the long haul. Not just theory but practices that work on real UK job sites.
Understanding Tile Grout
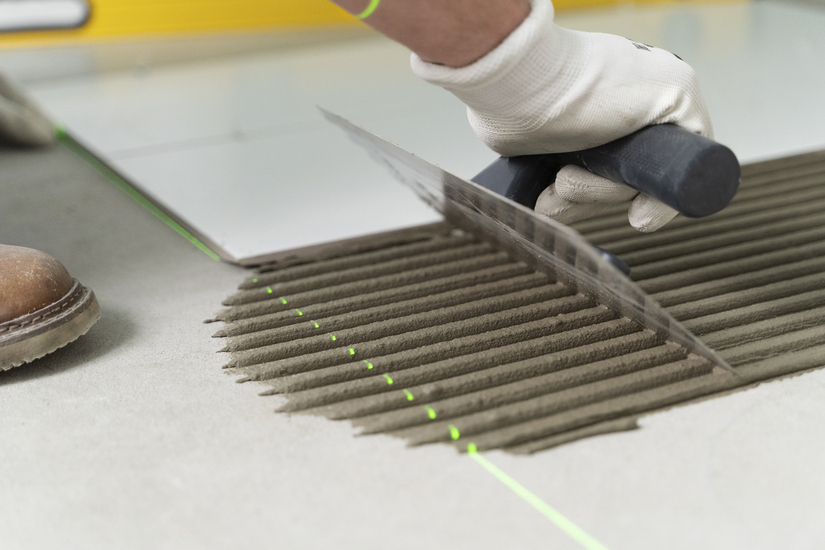
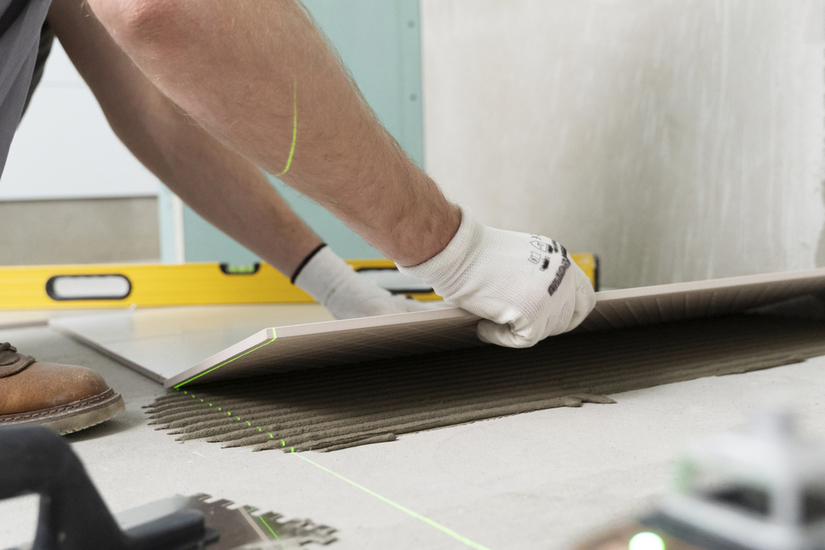
Grout isn’t glue. That’s the first thing. Adhesive bonds the tile to its surface, while grout fills the gaps between them.
Those narrow gaps aren’t decorative gaps, they’re expansion spaces, necessary for the tiles to move with the walls, floors, and temperature changes without cracking.
In the UK, the most common choice for homes is cement-based grout. It’s cheap, comes in a bag of powder to mix with water, and does the job in bathrooms, kitchens, and general living areas.
Variants with polymer modification add flexibility, which is handy where surfaces are prone to slight movement, like timber floors.
Epoxy grout was once reserved for commercial kitchens and swimming pools, but is now creeping into domestic situations.
The appeal is obvious, it’s almost waterproof, doesn’t absorb stains, and can withstand strong cleaning products. It is, however, more expensive and less forgiving to apply.
A note on standards: BS 5385 is the British Standard for tiling and covers things like joint widths and expansion gaps.
Homeowners may not read it from cover to cover but professionals do for good reason, it’s what separates a patchy DIY job from one that will last.
Getting The Mix Ratios Right
Grouting isn’t a matter of “a bit of water until it looks right”. That’s why so many DIY jobs end up with joints that crumble or discolour. Ratios matter.
For cement-based grout, the mix is usually three parts powder to one part water, but the instructions vary by manufacturer.
The key is consistency: aim for creamy and workable, not runny. If it slumps off the trowel like soup, it’s too wet.
If it crumbles as you spread, it’s too dry. The middle ground is a paste that holds its shape yet glides into joints with a firm push of the float.
Epoxy grout takes away some of the guesswork since it usually comes in pre-measured components, resin, and hardener. But accuracy is even more important.
Scraping out half a tub and “eyeballing” the ratio is asking for trouble. Epoxy that isn’t properly balanced may never set correctly, leaving a sticky mess that’s impossible to fix without starting over.
A few professional habits make all the difference:
- Always measure water with a jug rather than splashing it in by sight.
- Mix with a paddle drill on a low setting to avoid whipping in air bubbles, which weaken the mix.
- Allow cement-based grout to rest (slake) for a couple of minutes after mixing, then stir again before use. This helps the chemicals fully activate and ensures smoother application.
Overwatering is the biggest mistake. It may look easier to spread, but the result is weaker joints and white efflorescence on the surface once dry. Patience in mixing pays off.
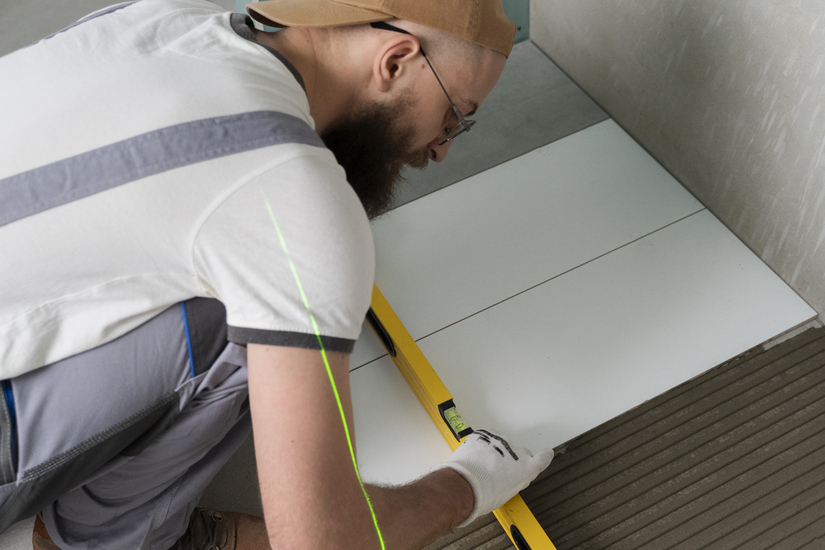
Joint Profiles: Aesthetics And Function
Grout joints aren’t just gaps filled in, they shape the whole look of a tiled surface. Walk into any bathroom, and your eyes don’t just see the tiles, they see the lines in between. That’s the joint profile at work.
Flush joints, where the grout sits level with the tile surface, are common in the UK for bathrooms and kitchens.
They give a smooth finish that’s easier to clean. There’s less of an edge for dirt to cling to, and a sponge glides over them with no resistance.
Recessed joints, where the grout sits slightly below the tile edge, can look nice in some situations but have drawbacks.
Those little ledges collect dust and water. Outdoors, though a small recess can make sense, it helps shed rain and weathering.
Concave or rounded joints, sponged with a jointing tool or even the edge of a sponge, are the happy medium. They’re easier on the eye and tend to wear better than sharp-edged finishes.
Consistency is key. A patchwork of different depths looks amateurish, no matter how well the tiles are laid.
The trick is in the sponging: too much water or pressure pulls the grout out of the joints, leaving dips. Professionals keep a light touch, cleaning the tile faces without hollowing the lines. The result is uniformity across the whole wall or floor, which is what makes a job look “finished”.
Hygiene And Maintenance Tips
Grout has a weakness, it’s porous. It soaks up water, grease, and dirt if left unprotected which is why hygiene becomes an issue.
The black mold that creeps along bathroom grout lines isn’t just ugly; it thrives because grout gives it a foothold.
Prevention is key. Epoxy grout is more expensive but is virtually waterproof and stain resistant, which is why it’s often specified for food preparation areas and wet rooms.
For cement-based grout, sealing is highly recommended. UK tile shops stock a range of impregnating sealants that soak into the grout and create a barrier without changing the appearance.
Daily cleaning matters too. Mild detergent in warm water is often enough for everyday maintenance. Harsh bleach may be tempting for speed, but can erode grout over time. Steam cleaners can be effective but need to be used with care, lingering too long in one spot can damage the surface.
Ventilation is another unsung hero. Bathrooms without extractor fans or kitchens without good airflow are mould breeding grounds. Simply improving the air circulation can reduce how often you need to scrub the grout.
Eventually, all grout reaches its limit. Crumbling edges, deep-set stains, or persistent mould are signs it’s time to rake out and regrout. It’s a lot of work, but trying to patch over failing grout usually looks worse.
Hygiene isn’t just about looks. Poorly maintained grout harbours bacteria, which isn’t ideal in food preparation areas. A proactive approach, seal it, clean it, ventilate properly, turns grout from a weak point into a line of defence.
Pro Mistakes To Avoid
Some errors crop up time and again:
- Mix the entire bag at once. By the time half is used, the rest is sitting in the bucket. Smaller, manageable batches are far safer.
- Sponging too aggressively. This washes colour pigments out, leaving pale, streaky joints.
- Ignoring expansion joints. Large tiled floors without them eventually crack under movement.
- Grouting before the adhesive has cured. Trapped moisture leads to weak bonding and uneven colour.
- Failing to tackle grout haze promptly. That thin, cloudy film left on tiles becomes nearly impossible to remove if allowed to dry fully.
Each mistake comes from impatience or inattention. The remedy is slowing down, respecting cure times, and treating finishing as seriously as tile placement.
Tools And Materials Checklist
A pro’s toolkit for grouting doesn’t have to be extravagant, but the right tools make a clear difference:
- A good rubber grout float for pressing material deep into joints.
- Buckets, plural, so dirty water doesn’t contaminate fresh mixes.
- Mixing paddle attached to a drill for lump-free results.
- A dense sponge, wrung nearly dry, for careful cleaning.
- Jointing tools for shaping consistent profiles.
- Sealant and applicator for protecting cement-based grout once cured.
- Protective gloves are necessary because grout is alkaline and harsh on skin.
Optional, but handy: a grout rake for repairs, a spray bottle for controlled misting, and a measuring jug for water. These small details prevent big headaches.
For tradespeople wanting to sharpen their skills before working on live projects, tools like Tradefox provide a realistic simulation.
It’s a training app designed for electricians, plumbers, and other trades to practise techniques safely, without the risks of working directly with live systems or costly materials. A modern way to build confidence before stepping on-site.
Conclusion
Grouting is the quiet stage of tiling, but it makes or breaks the result. Get the mix ratios right, form consistent joint profiles, and protect the work with sound hygiene practices, and tiles will look sharp for years rather than months.
It isn’t glamorous, but it’s craftsmanship in the details, those fine lines that hold everything together. Whether tackling a small bathroom wall or a large kitchen floor, the professional approach pays off. And for those unsure, a skilled UK tiler can save more than just time; they save the finish.
Done right, grout isn’t background filler. It’s the seal, the shield, and the finishing stroke that turns a tiled surface into a lasting piece of work.