Outdoor taps seem simple, just a handy outlet for the garden hose, right? But ask any plumber who’s had to fix a flooded kitchen wall or a burst pipe mid-winter, and they’ll tell you: there’s a right way to fit one.
In the UK, water fittings are more than convenience; they’re subject to regulation for good reason.
A properly installed outdoor tap should let you water plants or wash the car without risking contamination, leaks, or frost damage.
That means thinking beyond the tap head, about isolation valves, non-return protection, and how to keep it safe when the frost sets in.
The Legal And Practical Basics
Under the UK Water Supply (Water Fittings) Regulations 1999, outdoor taps fall into a category that requires protection against backflow, basically, water flowing backwards into your clean supply. That’s why a double check valve is mandatory.
It’s also worth noting that if you’re altering existing plumbing, especially on the mains side, it might technically count as a water fitting installation under local bylaws.
While most domestic outdoor taps don’t need formal notification, the work must comply with regulations.
In terms of positioning, a good rule of thumb is between 500–750 mm above ground. Keep it near an existing cold-water feed (most often under the kitchen sink) to avoid long pipe runs. Less distance means fewer joints and lower leak risk.
Planning The Installation
Like any job, success starts before you pick up a tool. The best place for an outside tap is a section of external wall directly behind an internal cold water feed.
Kitchens are ideal as most UK homes have an accessible copper or plastic pipe leading to the sink.
Before you cut or drill, make sure the main stop tap is closed and the pipework is drained. The hole through the wall should slope slightly downwards towards the outside, that simple gradient helps the water drain out, not in.
Get your bits: 15mm copper or plastic pipe, isolation valve, double check valve, outdoor tap fitting, PTFE tape, wall plate, drill with a masonry bit, and some silicone sealant. It’s not a long list, but every one is important.
Isolation: Controlling The Flow Safely

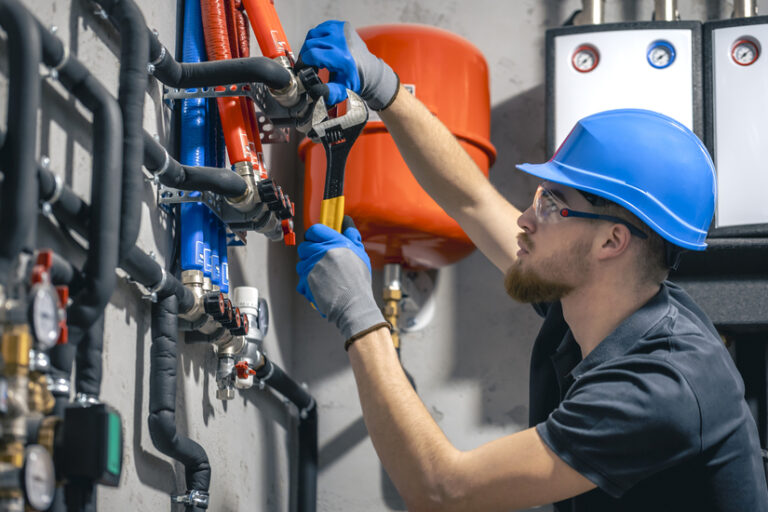
Isolating a valve is one of those details that makes a clean job a clean job. It lets you turn off water to the outside tap without shutting off the whole house.
The valve should sit right after the tee on the internal pipework. This way, the outside line can be isolated or drained if needed.
Many pros add a drain-off valve next to it, especially on older homes without modern insulation. That way, you can bleed the line dry before winter, no cracked pipes, no surprises.
Both lever valves and service valves work fine, though lever types are easier to operate quickly. Just make sure the fittings are compression or push-fit rated for potable water and the joint is snug but not over-tightened.
Backflow Prevention: Staying Within UK Regulations
Here’s the serious bit. Backflow is when water runs in reverse, say, a garden hose in a muddy bucket or fertiliser mix, and that contaminated water gets into your clean mains. That’s why backflow prevention is non-negotiable.
UK regulations demand a double check valve on any outdoor tap feed. It’s a simple inline fitting with two spring-loaded valves that only allow one-way flow. You can fit it inside the property, ideally just after the isolation valve.
Some modern outdoor taps come with an integrated check valve, but don’t take that at face value, check it’s WRAS-approved and compliant.
For extra peace of mind, WRAS (Water Regulations Advisory Scheme) approval means both safety and insurance cover. Skipping this step might save a few minutes, but it can cost you big time if contamination occurs.
Pipe Routing And Fixing
Now that your internal connections are done, it’s time to route the pipe through the wall. A 15mm copper or plastic pipe is standard for most UK domestic setups. Drill the hole slightly bigger than the pipe, usually around 22mm, and angle it gently downwards so any condensation or stray water runs out.
Feed the pipe through and clip it inside the house every 300–500 mm. Outside, mount a proper tap backplate or wall plate elbow; never rely on the tap threads to hold it in place. Use wall plugs and stainless screws for a neat and solid fix.
Before you seal, check the alignment: the tap should sit level and comfortable to reach, not sticking out awkwardly or pointing down too far. Seal the wall entry with silicone or expanding foam to prevent draughts and pests.
Freezing Protection: Keeping It Working Through Winter
This is the bit many DIYers miss, until the first freeze. Outdoor taps are the most prone to bursting, especially when the water in the pipes expands as it freezes.
Start with lagging. Insulate the external pipework with foam sleeves designed for outdoor use, then wrap them in waterproof tape to prevent moisture from getting in. Don’t leave gaps around elbows or joints.
Next fit a tap cover or frost jacket before the temperatures drop. They’re cheap and make a big difference.
If you’ve fitted that drain-off valve earlier, use it every winter, turn off the isolation valve, open the outside tap, and drain the section fully.
Some modern setups have frost-proof outside taps with a built-in self-draining mechanism. They cost a bit more but will pay for themselves in saved repair time.
Testing, Commissioning, And Final Tests
Once everything’s connected, turn on the isolation valve first, then slowly open the main stop tap. Let the system fill and check every joint with a tissue or finger for moisture. Even the smallest bead of water means a compression fitting needs another nip.
Run the outdoor tap for a few seconds to flush out debris and check for good flow. When you close it, watch for any delayed drips, they could be a worn washer or poorly sealed thread.
Lastly, make sure insulation covers all exposed pipework and the tap area feels firm and secure.
Good plumbers always check backflow valves after installation, a quick blowback test should confirm one-way flow only.
Tools Like Tradefox For Practice & Planning
If you’re new to plumbing or want to hone your skills before working on live systems, simulation platforms like Tradefox are really useful. You can practice fitting isolation valves, routing pipes, and even backflow scenarios without any material waste or risk.
Many apprentices and self-employed tradespeople use it to stay sharp between real-world jobs. It’s a great way to practice the precision you need for outdoor tap work.
Bottom Line
A well-fitted outdoor tap is one of those small home improvements that quietly adds long-term convenience, as long as it’s done right. The three golden rules?
Fit an isolation valve, install a WRAS-approved double check valve, and protect against frost. Skip any of those and you’re asking for leaks, contamination, or cracked pipework.
Whether you’re a DIYer improving your setup or a tradesperson maintaining standards, the goal’s the same: make it clean, compliant, and resilient. When it’s done right, you won’t have to think about it again, and that’s the best kind of plumbing job there is.