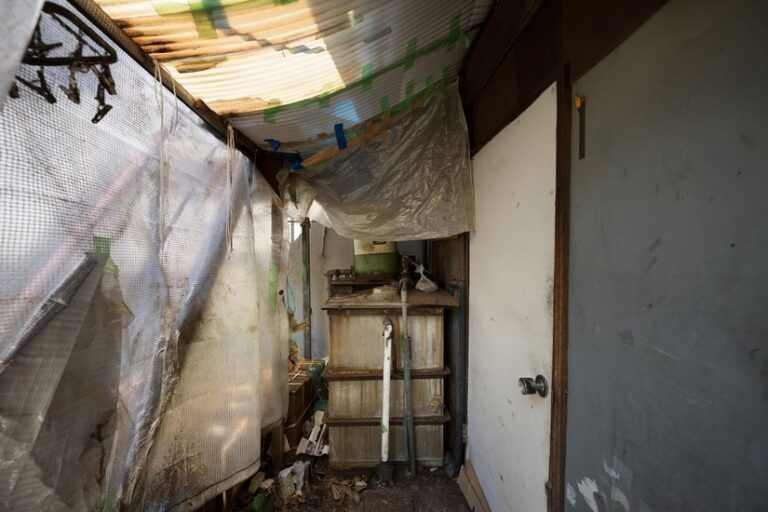
Walk past any old terraced or Victorian semi in the UK and you’ll see weathered brick joints, crumbly mortar, or green stains seeping through the gaps.
It’s easy to ignore, but that thin layer of mortar between the bricks is one of the biggest defences your home has against water and frost damage.
When it fails, water gets in, and then you’re on borrowed time before spalling or damp patches appear inside.
Repointing isn’t just about nice finishes. It’s about structural integrity and keeping your home weatherproof.
Done well, it can make the brickwork last another 50 years. Done badly, it traps moisture and does the opposite.
So here we’ll look at how to do it properly, from mix ratios and tools to the costs and when to call in someone who does it every day.
Understanding Repointing And Its Role
Mortar’s purpose is simple but vital. It holds the bricks together while allowing the wall to “breathe,” flex slightly with movement and let moisture escape.
Over time, exposure to rain, frost and pollution erodes the softer mortar faster than the bricks. That’s by design; you want the mortar to give way first, not the bricks themselves.
Repointing replaces that worn out material. It’s not the same as tuckpointing (which is mostly cosmetic) or full brick replacement. It’s maintenance, the kind that keeps moisture out and walls stable.
Older UK properties used lime mortar, which stays soft and breathable. Modern builds go for cement-lime blends for strength and faster setting.
Either way, the key is compatibility. A hard cement mix on soft Victorian brick can cause cracking and long term decay, while using weak lime on a new cavity wall won’t stand up to modern weather loads.
Mortar Mix Ratios: Getting The Balance Right
Every good repointing job starts with the right mix. The ratio you choose affects not only appearance but performance.
Too much cement and the mortar becomes too rigid, it won’t flex, and the brick faces will pop off in frost. Too little binder and it’ll crumble away within a few seasons.
For traditional lime mortar, the go to is roughly 1 part lime to 2.5–3 parts sand. It’s breathable, self healing to a degree and suits heritage walls that move slightly over time.
For modern cement-lime mortar, a 1:½:4 or 1:1:5 ratio (cement:lime:sand) is typical. The lime improves workability while the cement provides strength and water resistance.
The sand itself plays a big part. Sharp, well graded sand helps grip and adds body. Soft sands may give smoother finishes but lack strength.
Always aim to match the colour and texture of the existing mortar, that’s how you avoid patchy repairs that stand out against old brickwork.
Tools & Materials You Need
You don’t need fancy equipment to repoint but it does require preparation. The essentials are pointing trowel, plugging chisel, raking bar, hawk, jointing tool, and wire brush.
A bucket trowel and mortar board help with mixing and loading and dust protection (goggles, mask, gloves) is non negotiable.
Some tradespeople use a mortar gun for speed especially on large uniform walls but most still prefer the tactile control of a trowel.
Sand choice again matters here, sharp sand for exterior walls, sometimes mixed with a bit of soft sand to mimic old lime textures.
Note: while pre-mixed mortars can save time not all are suitable for heritage or conservation work. Always check they meet BS EN 998-2 standards for masonry mortars and if relevant match the class (Type N or O) for the job.
The Repointing Process: Step-By-Step
There’s an art to repointing and it’s mostly about patience. The process starts with raking out, removing old mortar to a depth of about 15-20mm.
Use hand tools if possible; power grinders can easily gouge brick edges and ruin the bond line. After raking the joints should be brushed clean and lightly dampened. That small step stops the new mortar from drying too quickly.
Next is mixing and applying. Work small sections at a time, pressing mortar firmly into the joints. The goal isn’t just to fill the space but to compact it tightly.
Air pockets are a shortcut to failure. Once the mortar has firmed up, but not too wet, and not bone dry, you can shape or “strike” the joints. The finish depends on the property:
- Flush joints for modern builds.
- Weather-struck for better rain runoff.
- Recessed or bucket-handle for heritage detail.
Cost And Labour Expectations
Finally let the mortar cure slowly. Keep it damp for a couple of days especially if you’re using lime to prevent cracking. Direct sun or frost is the enemy here, both will ruin new work in hours.
Repointing costs can vary like crazy depending on the area, height and what kind of mortar you’re dealing with. You might pay £250–£400 for a small patch job on a low wall, while a full external wall job could easily cost £1,000–£2,500.
A full house repoint, say, a typical three bed semi can be as much as £3,000 to £8,000 because the labour is so slow. And it’s slow because repointing is a tedious & dusty job that you can’t rush.
The biggest part of the cost is just man-hours. You’re not just paying for someone to do a job, you’re paying for their time, and time is precious when you’re working on a wall like that. Lime mortar jobs are even slower still because you have to cure them gently, which is a whole lot of extra work.
If you’re dealing with a listed property you’re going to want to hire a specialist, and be prepared to pay top dollar, often double what a general brickwork repair job would cost. But you are getting what you pay for: care, compliance and quality work.
When To DIY And When To Hire?

DIY repointing is doable on low garden walls, garages, or small repair areas if you’ve got the right hand tools and you’re not afraid to get stuck in. Just remember, consistency and technique are way more important than how fast you can work.
But let’s be honest, that’s exactly why most pros make a living from it. You can’t just pretend to be a bricklayer, someone who’s done a full façade, a tall chimney, or period home needs to know what they’re doing and needs to have some serious skill.
They need to be able to read a wall, they need to know how to match the mortar colour, how to joint it just right… that takes years of experience.
If you’re going to hire a professional, it’s definitely worth it in the following situations:
- The wall is load-bearing or cracked.
- It's a tall wall or you need scaffolding.
- You're not sure what kind of mortar you should use.
The pros also have insurance, proper dust extraction gear, and most importantly they know how to leave a finish that looks like it was done by a pro – not something you can just knock up with a trowel and a bucket.
Common Mistakes To Avoid
Most repointing jobs that go wrong come down to being in a rush or being a bit clueless. Using a cement-rich mix on soft bricks is a classic mistake.
It seems strong & robust, but once the frost sets in, the bricks take the strain instead of the mortar, and then they just crumble.
And if you skip the dampening step or try to work in frost, you’re asking for trouble. The joints will dry out too fast and crack before they even set. And even small gaps or poorly compacted joints become an entry point for moisture.
Colour matching is another real easy mistake to make. If your mortar is too grey or too smooth compared to the rest of the brickwork, it’s going to stand out like a sore thumb. A bit of testing before you start the job saves a world of hassle in the long run.
Using Tools Like Tradefox to Build Skill
If you’re training up or want to sharpen your repointing technique before taking on real work, simulation tools like Tradefox are worth a look.
It lets tradespeople, apprentices, and DIYers practise tasks such as mixing, jointing, and applying mortars safely, without wasting materials or risking wall damage.
For those looking to transition from DIY to professional-level results, it’s a solid way to bridge that gap.
Doing It Once, Doing It Right
Repointing is one of those slow, mindful jobs that rewards patience. It’s not glamorous, but it’s foundational, literally. Get the mix right, keep your tools sharp, and take your time.
When you match the old mortar and apply it carefully, the result looks invisible, as if the wall was never touched. That’s the mark of good brickwork: solid, weatherproof, and quietly reliable for decades to come.