



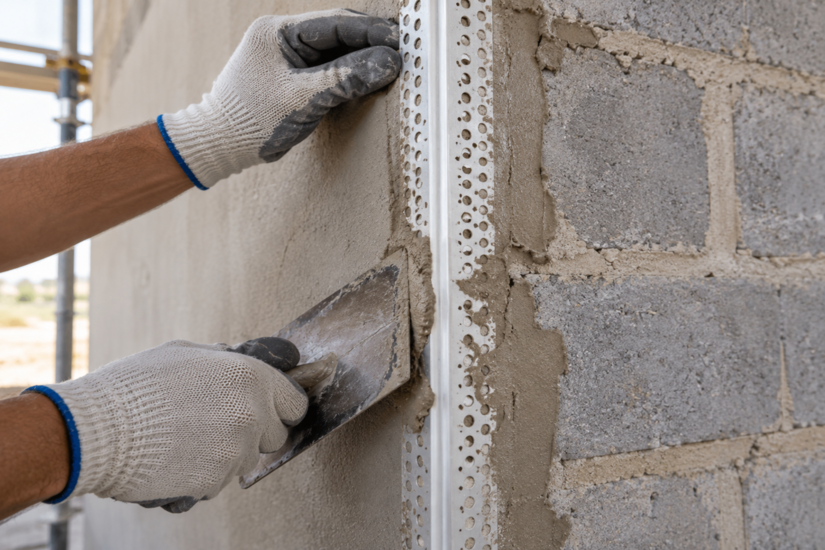
Plaster beads are one of those components that separate a clean, durable finish from a job that cracks, chips, or fails within a year. For anyone working in plastering or rendering, or training towards the trade, knowing which bead does what is core competence, not optional knowledge. Get the bead wrong and you compromise edge protection, water management, and the longevity of the finish. Get it right and the substrate performs for decades.
This guide covers the three bead types tradesmen reach for most: angle beads, stop beads, and bellcast beads. It explains what each one does, where it belongs, the correct material for the conditions, and the fixing detail that keeps the work compliant.
What Do These Beads Actually Do?
Plaster beads are preformed profiles, usually galvanised steel, stainless steel, or PVC, fixed to the substrate before plastering or rendering starts. They give the plasterer a straight, consistent line to work to, and they reinforce the areas of a finish most prone to failure: external corners, terminations, and transitions between materials.
Material choice is a specification decision that affects durability and compliance.
- Galvanised steel: Designed for internal plasterwork. The zinc coating protects the steel indoors but is unsuitable for external or wet areas, where corrosion eventually bleeds rust staining through the finish.
- Stainless steel: The correct choice for external render, coastal or high-humidity locations, and anywhere moisture exposure is a factor.
- PVC and uPVC: Corrosion-proof and widely used in modern thin-coat and render systems, including external wall insulation.
Always match the bead material to the exposure conditions of the substrate. This is not a matter of preference.
Angle Beads
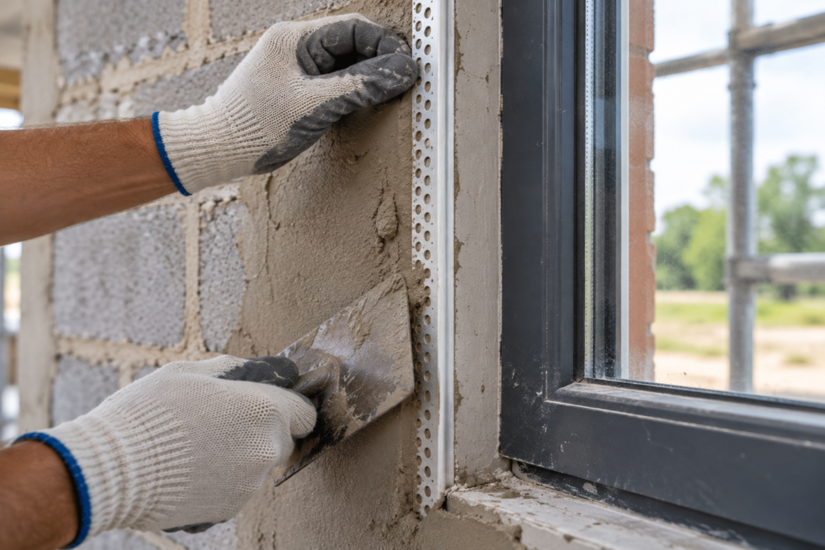
Angle beads, also called corner beads, are the most used of all the render and plaster beads on a typical job. They protect and define external 90-degree corners, the vulnerable arris where two surfaces meet and where knocks, furniture, and foot traffic cause chipping.
An angle bead gives the plasterer a defined edge to rule off against, producing a crisp, plumb corner every time.
Where Angle Beads Are Used
- External wall corners internally: The classic application on any room with an exposed corner.
- Window and door reveals: Protecting the arris around openings.
- Structural columns and pillars: Reinforcing exposed vertical edges.
- Any exposed 90-degree arris: Wherever a corner is at risk of impact.
Fixing Angle Beads Correctly
Set the bead plumb and true, with the nose projecting to the correct plaster thickness. Fix with dabs of the same plaster or a suitable bead adhesive, typically bedded at a minimum of 300mm vertical centres. In rendering, mechanically fix using galvanised or stainless steel nails compatible with the bead material and complying with BS 1202 Part 1, fixed at maximum 600mm centres.
Check for plumb with a level before the material sets. A bead fixed out of true will telegraph through the finish and cannot be corrected once cured. For thin-coat systems, specify thin-coat angle beads with a narrower wing so the mesh does not sit proud of the reduced coat thickness.
Stop Beads
Stop beads, also called plaster stop or edge beads, form a clean, defined edge wherever plaster or render terminates against another material or an opening. Where a finished surface meets a door frame, a window frame, a different wall finish, or simply stops, a stop bead seals the exposed edge and gives a straight termination.
Without one, a terminated edge is fragile, irregular, and open to cracking and moisture ingress.
Where Stop Beads Are Used
- Terminations against window and door frames: Sealing the edge neatly against joinery.
- Edges meeting skirting or other trims: Creating a defined stopping point.
- Junctions with a different finish material: Where plaster meets tile, timber, or masonry.
- The perimeter of openings where render stops: Providing a controlled edge externally.
Choosing the Right Depth
Stop beads come in a range of depths to suit the coat thickness, from thin skim coats up to float and set work. The rule is simple: the bead depth should match the finished plaster thickness so the nose sits flush. Check the manufacturer range and select accordingly. An undersized bead sits below the finish, and an oversized bead stands proud, so neither reads cleanly.
Bellcast Beads
Bellcast beads, also known as drip beads or renderstop beads, are a water-management component. They are fitted at the base of external render and at horizontal terminations to throw rainwater clear of the wall below.
The bellcast profile has a nose that projects outward and slightly down, breaking surface tension so water drips off the edge instead of tracking back onto the wall face beneath. In UK weather this is not cosmetic. Controlling water at render terminations directly affects the durability of the wall and the substrate behind it.
Where Bellcast Beads Are Used
- The base of external render: The primary application, above ground level and clear of the DPC.
- Above window and door heads: Shedding water clear of openings.
- Horizontal render terminations: Wherever render stops and water must fall away.
- Transitions to a plinth or different material: Managing the junction cleanly.
Positioning and the DPC: Get This Right
This is where compliance and durability are won or lost.
- Keep render clear of the ground: Render should terminate a minimum of 150mm above finished ground level. Below that, water shed from the render lands on hard surfaces and splashes back onto the wall.
- Respect the damp proof course: Position the bellcast so the drip nose sits at least 150mm above finished ground level, or at DPC level, whichever is higher, and bed the wing so the DPC itself stays unobstructed.
- Never bridge the DPC: Render carried down across the damp proof course creates a moisture path into the wall. This is a defect, not a detail, and it must be avoided.
Material for External Use
Bellcast beads in external applications should be stainless steel or PVC. Galvanised steel in this exposed, wet-prone position will corrode and fail, staining the render as it goes.
Choosing the Right Bead: Quick Reference
| Bead type: | Primary function: | Typical location: |
|---|---|---|
| Angle bead | Protect and define external corners | Corners, reveals, columns |
| Stop bead | Neat, sealed termination edge | Against frames, junctions, edges |
| Bellcast bead | Shed water clear of the wall | Base of render, above openings |
Fixing and Best Practice on Site
A few principles apply to every bead type, whatever the job.
- Prepare the substrate: Backgrounds should be sound and free of mould, oil, grease, and soluble salts, which increase the risk of metal corrosion.
- Set true, plumb, and level: Check every bead before the fixing medium sets, because it cannot be adjusted afterwards.
- Match depth to coat thickness: The nose should finish flush with the surface.
- Keep the nose clean: Wipe plaster off the profile so the line reads sharply.
- Specify material to suit exposure: Stainless steel or PVC externally and in wet areas, galvanised steel only in dry internal conditions.
For external render, workmanship should follow the relevant British Standard and the specific system manufacturer’s technical data, which takes precedence where it is more detailed. Monocouche and thin-coat systems have their own bead ranges and fixing requirements that differ from traditional sand and cement render.
Once you know how to choose and fix the right plaster bead, keep developing your plastering skills with Tradefox. Practise practical techniques through guided simulations and return to them whenever you need more practice.