



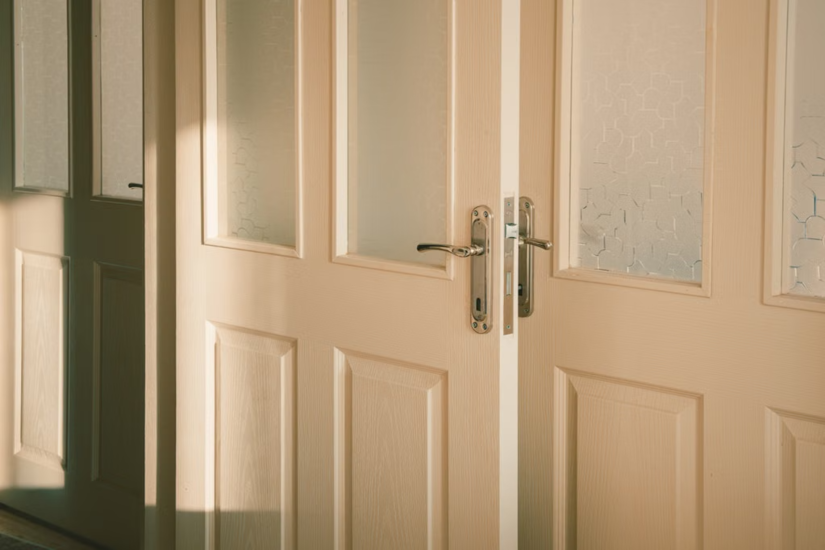
Paint behaves on a sample card and on real woodwork in two different ways. The same tin can look crisp on a flat offcut, then show up every flaw across a panelled door, a bumpy window frame or a long run of skirting. Reflections pick up each change in the surface, while colour, lighting and brush texture shift how the finish reads once it’s up.
When you’re weighing satin vs gloss, the obvious split is sheen. Gloss throws back a hard, bright reflection; satin softens it. That’s where most comparisons stop, and that’s the problem. Sheen on its own tells you nothing about how tough the paint is, how well it sticks, how it cleans, or whether it suits the surface you’re putting it on.
For a working decorator or someone training up, the finish has to tie three things together: the look the client wants, the state of the woodwork, and how the surface gets used once you’ve handed it over.
Satin vs Gloss: What Actually Differs
Satin and gloss describe how the dry film reflects light. Neither word tells you what’s in the tin. Satin can be water-based or solvent-based, and so can gloss.
| Factor | Satin | Gloss |
|---|---|---|
| Reflection | Soft, low glare | Bright, close to a mirror |
| Surface Flaws | Plays them down | Puts them on show |
| Prep Demand | Forgiving on minor marks | Unforgiving, every ridge reads |
| Decorative Effect | Understated across doors and skirting |
Sharp, lifts mouldings and profiles |
Satin hides small imperfections. It doesn’t fix them. Gloss does the opposite: it catches brush ridges, badly feathered filler and any dip in the surface, then shows them off under the first bit of light. Paint makers say the same thing in their own guidance, which is why prep matters more as the sheen climbs.
Sheen Isn't the Same as Opacity
These two get muddled constantly. Sheen is about reflected light. Opacity is about how well the paint blocks whatever colour is underneath.
Satinwood won’t cover a strong existing colour better than gloss just because it’s satin. And a shiny surface doesn’t prove you’ve laid down the film thickness the maker asks for. Check the spreading rate, the film build, and the number of coats. Judge coverage and sheen as separate things.
How Light Exposes Surface Flaws
Light raking across a surface shows up dents and ridges you’d never spot looking at it straight on. That’s exactly what happens on wide door faces, window boards and long lengths of trim.
Before you commit to a finish, look at the woodwork under the light it’ll actually live in:
- Daylight Direction: Check trim next to windows and glazed doors, where low sun rakes straight across it.
- Artificial Lighting: Think about downlights, wall lights and anything that throws light along a surface at an angle.
- Viewing Position: Look from where people actually stand, and down the full length of longer runs.
- Surface Shape: Compare flat panels, mouldings, joints and any patched areas.
Put up a sample using the exact primer, undercoat and topcoat you plan to use. Let it dry for the full time stated, then look at it under the lighting it’ll face in service. The same colour reads differently in satin and gloss, because the sheen changes how the light bounces back. Printed colour cards can’t show you that.
Durability Comes from the Formula, Not the Sheen
This is where the satin vs gloss argument goes wrong. People call gloss tougher and satin softer, as if the sheen decides it. It doesn’t.
Both come in hard-wearing trade grades. Johnstone’s, for one, makes water-based satin and gloss with stated resistance to scratches, scuffs, and greasy finger marks. Those are claims tied to those products, not promises that hold for every satin or gloss on the shelf.
Match the stated performance to where the paint is going:
- Handling: Door edges, frames, and anything hands touch all day take a beating.
- Cleaning: Confirm which cleaners, which methods, and how often the finish can handle.
- Abrasion: Furniture, bags and daily knocks wear a surface down over time.
- Contamination: Grease, detergents, and similar can attack the film.
- Environment: Check the product is meant for inside or outside use.
None of this saves a bad foundation. The toughest topcoat on the market can’t rescue weak adhesion under it. Grease, flaking old paint, or the wrong primer will bring it off, whatever the sheen.
"Washable" Doesn't Mean "Resistant to Every Cleaner"
Washable and chemical-resistant aren’t the same claim. Even a finish rated as washable can be wrecked by strong degreasers, disinfectants or an abrasive pad.
On commercial jobs, run the planned cleaning regime past the paint manufacturer. Write down any limits on cleaning during the first few weeks and pass them to the client or the maintenance team.
Water-Based or Solvent-Based Woodwork Paint
Picking the sheen and picking the technology are two separate calls. Satin doesn’t mean water-based. Gloss doesn’t mean solvent-based. You choose each one on its own.
Water-Based Finishes
Water-based woodwork paint tends to recoat faster, carries less solvent and holds its whiteness well over the years. How it brushes and flows changes from product to product.
Crown Trade Acrylic Satin is a good example: a quick-drying water-based finish with its own touch-dry and recoat times. Read those off that product’s data sheet, not from satin paint as a category.
Water-based doesn’t mean harmless, either. Preservatives and other ingredients can call for care around skin and eye contact. Johnstone’s technical information for its water-based satin carries allergy warnings and ventilation requirements.
Solvent-Based Finishes
Solvent-based satinwood and gloss still earn their place where the specified system suits the timber and the conditions.
Older-style alkyd finishes can yellow as they age, worst of all in whites and pale shades, and in spots that get little daylight. Swapping the sheen won’t stop that if the replacement is built on a similar formula. Compare the actual products. Don’t assume every solvent-based paint is tougher, or that every water-based one dries and holds colour the same way.

Matching the Finish to the Job
The right call changes with the surface and how it gets used.
Doors and Door Frames
Big flat door faces make every reflection obvious. Satin gives a quieter result; gloss leans into panels and mouldings and makes a feature of them.
Leave the stated drying time before you close painted surfaces against each other. Paint that feels dry can still bond to another painted face under pressure. Decorators call it blocking, and it pulls the finish off both sides. Go by the maker’s return-to-service time, not the touch-dry time.
Skirting Boards and Architraves
Satin takes the edge off minor waves and dings along older trim. Gloss sets up a stronger contrast against a flatter wall finish.
Repair quality still shows through with either one. Keep your prep consistent across filled patches, joints and the edges of old coatings, or the result looks uneven.
Window Joinery
Treat inside decoration and outside protection as two different jobs. Interior satinwood or gloss has no business on external joinery unless it’s rated for it.
Check the full exterior system, and sort out any damp or rot before you coat. Paint is not a repair for bad timber.
Floors, Stairs and Specialist Work
Standard trim paint isn’t automatically right for floors, stair treads or a specified protective system. Where the job calls for specialist performance, stick with the specified system or get written approval before you change it.
Check Old Coatings Before You Sand
Work out the likely paint history and the hazards before you disturb anything.
Old lead paint is the big one. The British Coatings Federation says lead pigments came out of most paints through the 1960s and were gone from decorative paints by the early 1980s. Treat any paintwork from before the 1960s as a likely source, which is the line HSE takes too, and test before you disturb it. That fresh-looking topcoat proves nothing about the layers beneath it.
Control Lead Exposure Before Any Prep
Don’t start sanding or stripping where lead might be present until you’ve assessed it and set up a controlled method. Two methods are off the table for lead paint:
- No Dry Sanding: Dry abrasion throws lead dust straight into the air.
- No Burning or Hot-Air Stripping: Overheating lead paint gives off lead fume.
Use wet methods, suitable extraction, and the controls your assessment calls for. Sound old paint can stay put, which cuts down disturbance where that’s the right call. Stripping everything back to bare timber isn’t automatically needed.
Lead has its own rules, separate from general chemical law: the Control of Lead at Work Regulations 2002 in Great Britain, and the Control of Lead at Work Regulations (Northern Ireland) 2003. If prep might disturb material that could contain asbestos, stop and get the information you need first, under the Control of Asbestos Regulations 2012.
Prepare the Whole Coating System
Once you’ve dealt with the hazards and the method, prepare the surface to the maker’s spec.
- Surface Condition: Find loose coatings, damp, rot and anything that needs repair.
- Contamination: Strip out grease, polish and residues with a method that suits.
- Repairs: Use compatible fillers and give them their stated drying time.
- Surface Key: Abrade sound existing coatings as specified, with your dust controls running.
- Bare Substrates: Prime exposed timber, MDF or other materials with the right primer.
- Compatibility: Confirm the old coating, primers, undercoats and topcoats all work together.
Don’t assume every satinwood is self-undercoating, or that every gloss takes the same undercoat. Makers differ. Use the current data sheet for the exact product in your hand, and ask the manufacturer if anything’s unclear.
Where sanding makes wood dust, use proper extraction and clean up as you go. Skip dry sweeping and compressed air, which just put the dust back in the air. Lead-contaminated dust needs the extra controls from its own assessment.
Managing Exposure During Application
The technical data sheet covers how to apply the paint and what it’ll do. The safety data sheet backs up your assessment of the hazards and the controls. Neither one replaces your own task-specific risk assessment.
For hazardous paints and solvents, duties fall under COSHH 2002 in Great Britain and COSHH 2003 in Northern Ireland, both as amended. Lead and asbestos run under their own frameworks.
Ventilation and Personal Protection
Size up the product, the amount, the method, the space, and who else is around.
Keep real ventilation going through application and drying. One open window isn’t automatically enough for enclosed work or heavier exposure. Match your gloves to the substances and how long you’re in contact. Never clean paint off your skin with solvent. Eye protection and any respiratory kit have to suit the job your assessment describes.
Spraying Needs Its Own Assessment
Spraying puts fine droplets in the air and can raise exposure well above brush or roller work.
Only spray a product that’s cleared for it. Assess ventilation, screening, and respiratory protection on their own terms. Particle filters alone won’t stop solvent vapour; that needs the right vapour cartridge. Keep ignition sources away from flammable products, follow the storage and waste rules, and don’t leave solvent-soaked rags lying around.
Drying, Recoating and Return to Service Aren't the Same
Paint can feel dry long before it’s reached its full hardness, adhesion, or cleaning resistance. Four stages, four different moments:
- Touch Dry: The surface has hit the maker's first drying stage.
- Recoatable: You can put the next coat on within the stated conditions.
- Full Cure: The film has finished curing.
- Return to Service: The maker clears it for handling, contact, cleaning, or use.
Short recoat windows don’t mean full cure. The gap between the two can be large, so read both off the data sheet. Follow the exact figures for temperature, humidity, ventilation and film build. Don’t thin the paint or switch application method unless the maker allows it. No single drying schedule covers every satin, and none covers every gloss.
Sign-Off and Handover
Agree on a sample before you commit to a big run. This is where satin vs gloss gets settled on the actual surface, not on a card.
Inspect at the right drying stage under the lighting you both agreed. Look for runs, misses, patchy sheen, contamination, and visible repair edges. Record the detail so the next person isn’t guessing:
- Product Details: Maker, range, colour reference and finish.
- Coating System: Primers, undercoats and topcoats used.
- Application Notes: Conditions on the day and any approved changes.
- Handover Rules: Limits on handling, closing contact surfaces and cleaning.
Local touch-ups can stay visible, down to differences in texture, film build, age or how they went on. Judge the repair honestly rather than promising it’ll vanish. Where it won’t blend, recoat the whole face or section to a natural break.
The finish you choose is only part of a good decorating job. Explore Tradefox’s courses and learn through guided simulations, with feedback as you progress and the option to repeat lessons whenever you need.